Basics
Settings
In the settings you can add additional accounts or categories for your transactions, define a PIN code, configure views and much more. Here is a brief overview:
- Advanced settings: Here you can specify further details such as the language, the design, the font size or the file location. Views and calculation methods can also be configured.
- PIN code / Touch ID: Activate or deactivate the lock to the app. Each time you open the app, you must then authorize yourself to be able to view your data.
- Change PIN code: If your Face ID or Touch ID doesn’t work, you must alternatively set a PIN code. You can change this PIN code here.
- Accounts: Edit, delete or add additional accounts for your transactions.
- Categories: Edit, delete or add further categories for your income and expenses. You can also assign further hashtags (subcategories) to each created category.
- Import and export: When importing data, you have the option of importing existing data from a CSV or text file into MoneyStats. If you want to make the data available to other programs, you can also export it.
- Backup: With the help of backups, you can create complete data backups to protect yourself against data loss or restore your data on other devices.
- Synchronization: If you want to synchronize your data in MoneyStats with other devices, you can add all your devices here (Mac, iPhone, iPad). All devices entered there will have access to your private iCloud.
- In-App Purchases: There are various purchases that you can make in the app in order to activate additional MoneyStats features or to use data synchronization.
- Help: Here you can ask questions to my chatbot. I tried to answer all of the frequently asked questions, but you can also ask me personally!
- Manual: A link to this manual! 🙂
- Tutorials (Videos): I made a series of explanatory videos on YouTube to introduce you to various topics in MoneyStats.
- Send me feedback: I look forward to all feedback, suggestions for improvement and questions. My goal is to make the app as intuitive as possible and to avoid any bugs. I will answer all questions as soon as possible and with every update I try to make MoneyStats even better!
- Follow me on Instagram: If you like MoneyStats, I would be happy if you subscribed to Instagram to stay informed about new features and changes.
- Rate the app: Support my app and help me to increase my popularity in the Apple App Store by leaving me 5 stars! I would be very very happy! 🙂
- Imprint: Here you will find all legal information about me and the app.
Under More / Settings / Advanced settings you can specify further details. Views and calculation methods can also be configured. Here is an overview of the various options:
- Language: Choose between Chinese, German, English, French, Italian, Japanese, Dutch, Norwegian, Portuguese, Russian and Spanish.
- Main currency: Determine the primary currency that you want to use as the basis for your evaluations. If you use other foreign currencies in MoneyStats, the exchange rate for the main currency is always calculated and saved. The main currency cannot be changed afterwards.
- Daily financial statistics: If the daily financial statistics are activated, you will occasionally get informative statistics of your finances.
- File location: You can optionally save your files (reports, document photos, backups, category pictures, etc.) in your private iCloud Drive or locally on your device.
- File quality: Here you can choose the quality in which the files (e.g. document photos or invoices) should be saved. Depending on the file storage location, these are then stored in smaller (mode: small) or full resolution (mode: very high).
- Design: Here you can change the color of the app.
- Dark mode: From iOS 13 and macOS 10.14 there is the dark mode available. Here you can decide whether you always want to have it activated or not. In automatic mode, however, the app uses the selected mode of the device.
- Font size: In addition to the normal font size, you can also increase the font by 3 levels.
- Contrast: With increased contrast, the light and dark tones are more clearly distinguished by some colors and fonts.
- Keyboard mode: In the extended keyboard mode, there is another field on the right-hand side for closing the keyboard and a field for saving the transaction on the lower right.
- Keypad: Choose between a top-down view in which the number keys run from top to bottom from 1 to 9. Or a bottom-up view, where the number keys run from bottom to top from 1 to 9.
- Hardware keyboard: With the iPad, you can optionally use your hardware keyboard as a number keyboard.
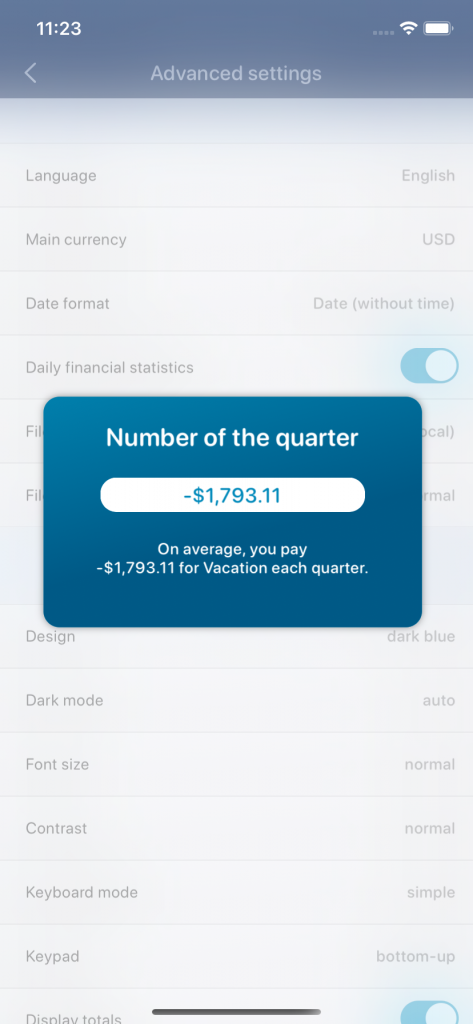
Daily financial statistics 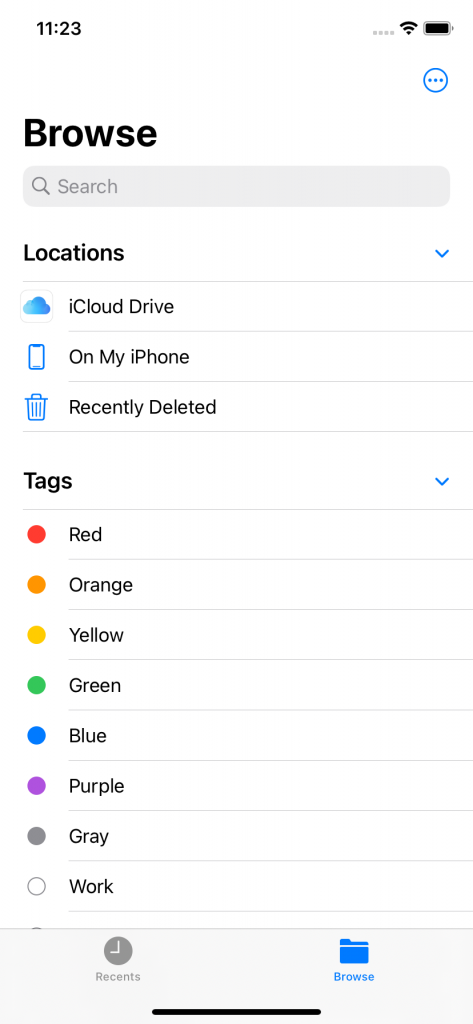
File location 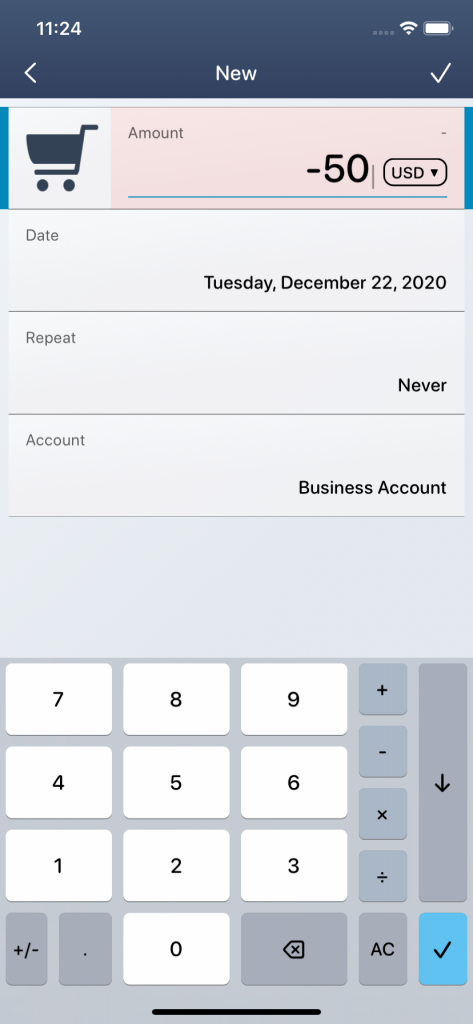
Extended keyboard mode
- Display totals: Deactivate this mode to hide the totals below the transactions.
- Display trend line: Activate this mode to add a linear trend line to the diagrams.
- Extended transfers: Activate this mode to display another button in the transaction view menu, which enables you to transfer transactions directly to another account.
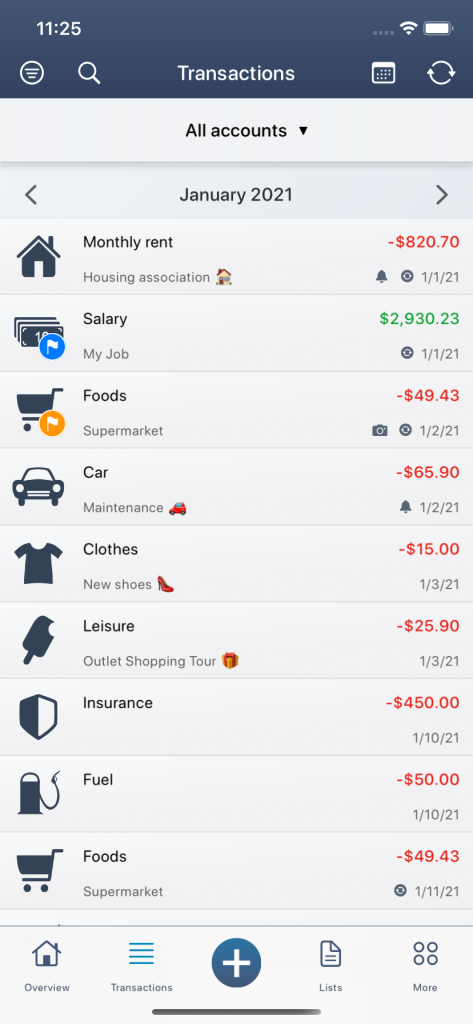
Hidden totals 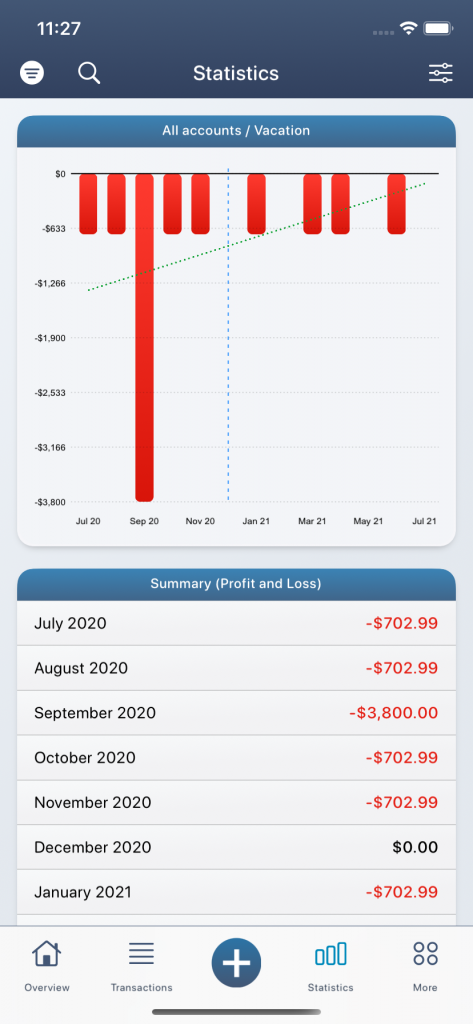
Trend line activated 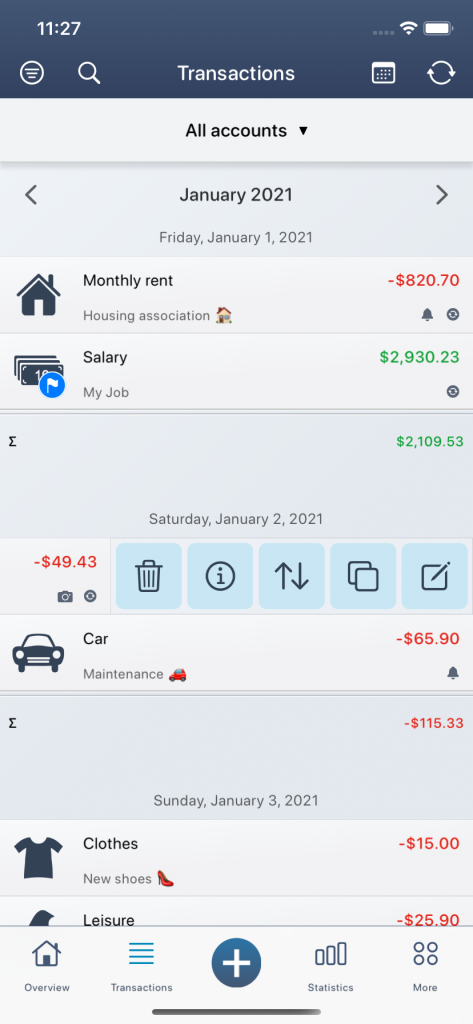
Extended transfers
- Examples when entering text: If you create a new transaction and enter a text there (title, recipient, usage or comment), you will be shown examples of auto-completion if you have already added transactions with the same text before.
- Account balance: Here you can change the calculation mode of the account balance as it should be used in the overview. Choose between end of month, beginning of month, end of day and now.
- Account balance mode: The account balance mode can either be set to simple or extended. In the extended account balance mode, the individual income and expenses are displayed as a small bar chart below the transactions in the transaction view (on the iPad on the left).
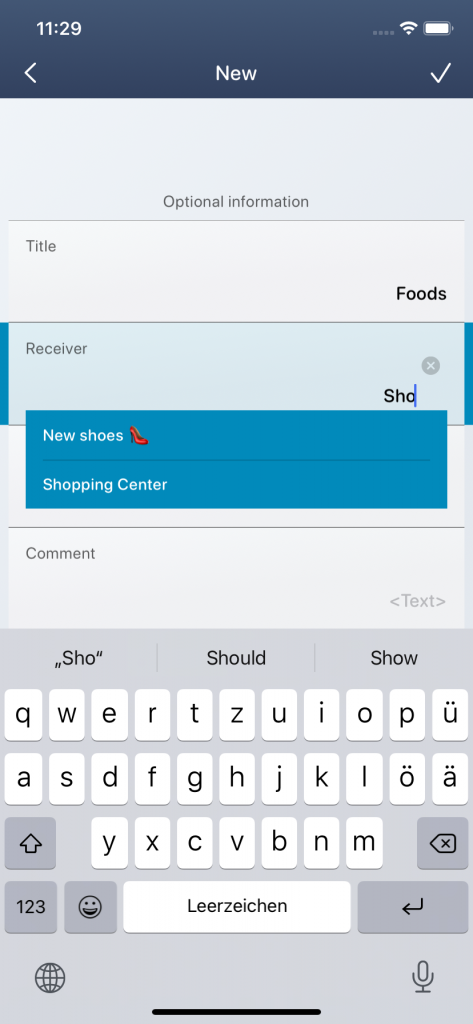
Examples when
entering text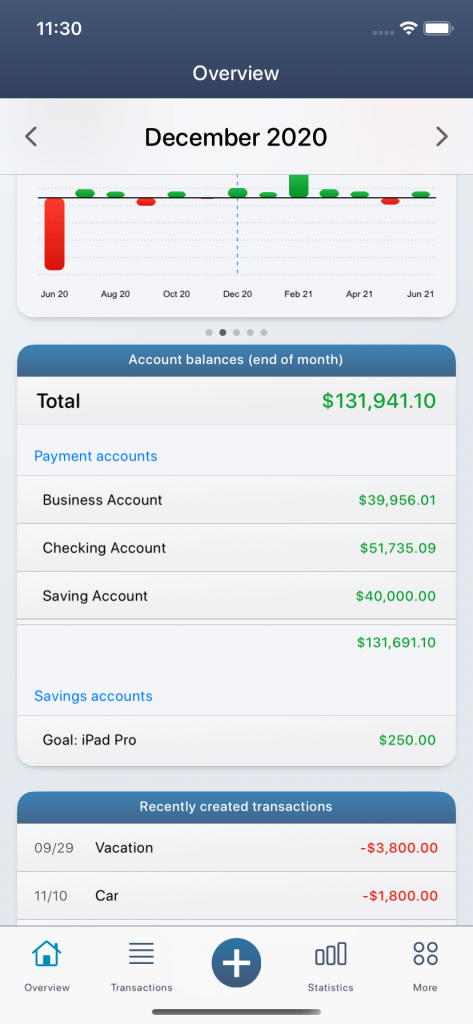
Account balance
(end of month)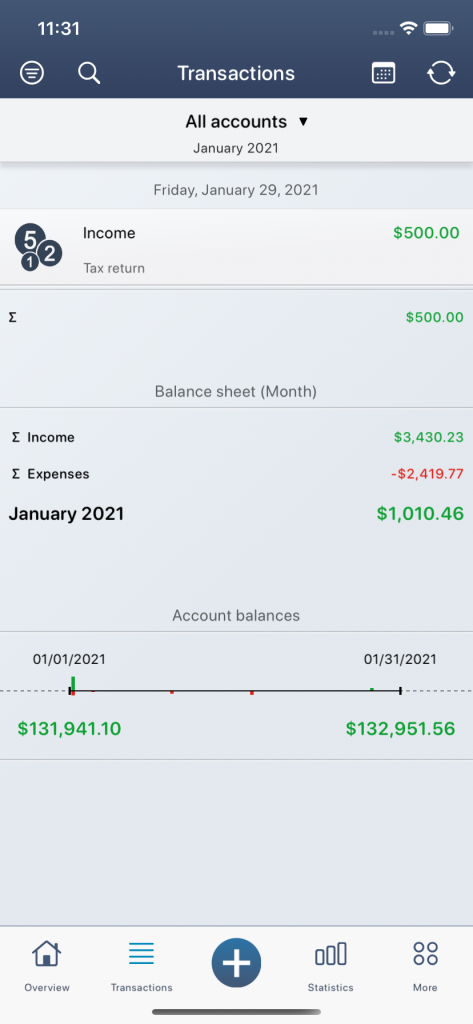
Account balance mode (extended)
- Beginning of the financial month: By default, the respective month always starts on the 1st day of the month. Alternatively, you can delay the start of the financial month by a few days. For example, if you select the 10th day, the month of April would no longer be from April 1st to April 30th, but from April 10th to May 9th
- Forecast calculation: Here you can choose between an averaged and exact forecast calculation. In the exact forecast calculation, the future balance forecasts are determined on the basis of the existing transactions. With the averaged forecast calculation, on the other hand, average values are determined and extrema are mitigated for a more realistic course.
- Budget calculation: In this mode, you can choose whether you want to calculate the available budget only based on budgeted categories or whether you want to apply it to all categories, even if no budget has been assigned to a category. For example, if you have a car category with no assigned budget and you create a new expense for this car category, this expense will still be deducted from your available budget if you have activated the “Calculate budget for all categories” mode.
- Period of the chart: Here you can configure where the timeline of the chart should start. In the balanced mode, the current period is in the middle of the timeline. However, if you prefer to display the past period, you can also close the timeline with the current period. The changes then affect all diagrams, such as the monthly balance sheet or the account balance history in the overview or the diagrams in the statistics.
- Account balance (history): With this multiple selection you can determine which accounts you would like to have displayed as account history in the diagram in the overview.
- Categorization: With this function you can categorize all your non-categorized transactions. Your categories and associated hashtags are used to check whether the transaction contains certain keywords in the title, recipient text, usage or comment. If so, the corresponding category is automatically assigned to the transaction.
- Search hashtags: If you have already created further subcategories (hashtags) within your categories, you can use this function to scan your transactions for them. If certain keywords are now contained in the text of title, recipient, usage or comment, the corresponding hashtags are automatically assigned to the transactions.
- Hashtag shortcut: In the transaction view, you can automatically assign a specific hashtag to a transaction by pressing the transaction longer. Here you define which hashtag should be assigned.
- Update exchange rates: In offline mode, temporarily or recently known exchange rates can be entered, so that an update takes place later. If you have assigned exchange rates to certain transactions that are not yet up to date, you can use this function to update them automatically. This function is also carried out automatically occasionally, for example when the app is restarted.
- Delete all transactions: All transactions are deleted here. Only other data such as categories, accounts, hashtags, goals or lists are retained. Before you do this, you should make a backup of your data!
- Delete all data: Here, all data of the app is deleted, i.e. all transactions, all budgets, all categories and accounts and everything else in the database are deleted. So you start again from scratch. Before you do this, you should make a backup of your data!
Accounts
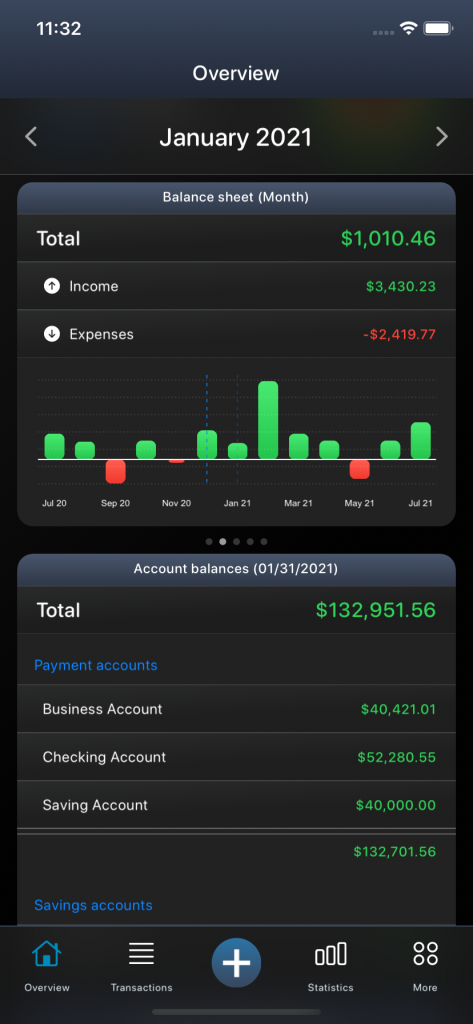
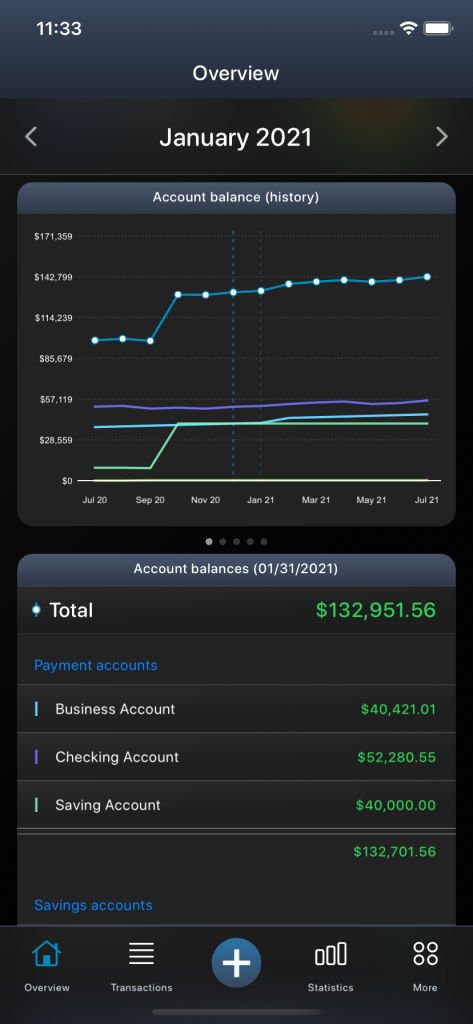
You can summarize, manage and evaluate your transactions in different accounts. The accounts are a rough subdivision of your transactions, which you can evaluate and filter in the statistics. Your accounts can represent different bank accounts (e.g., “checking account”, “savings account” and “business account”), but other use cases are also possible, such as accounts for family members or associations.
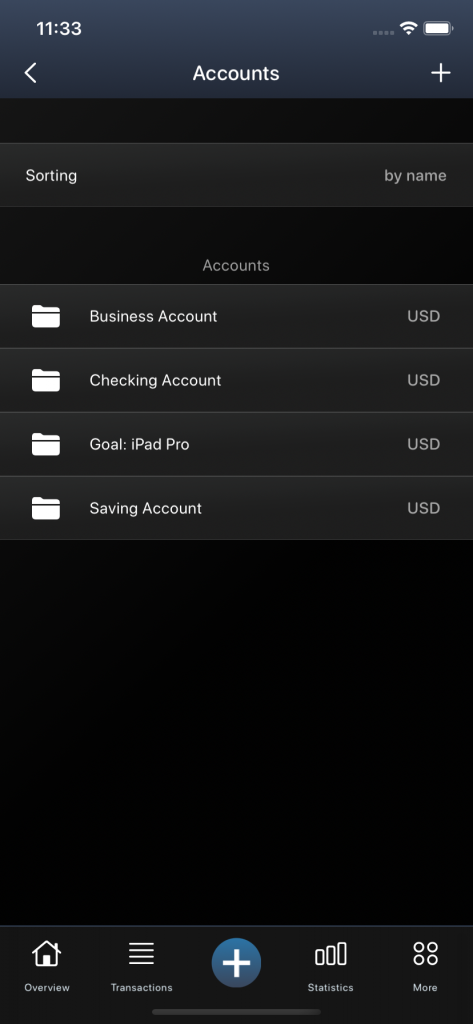
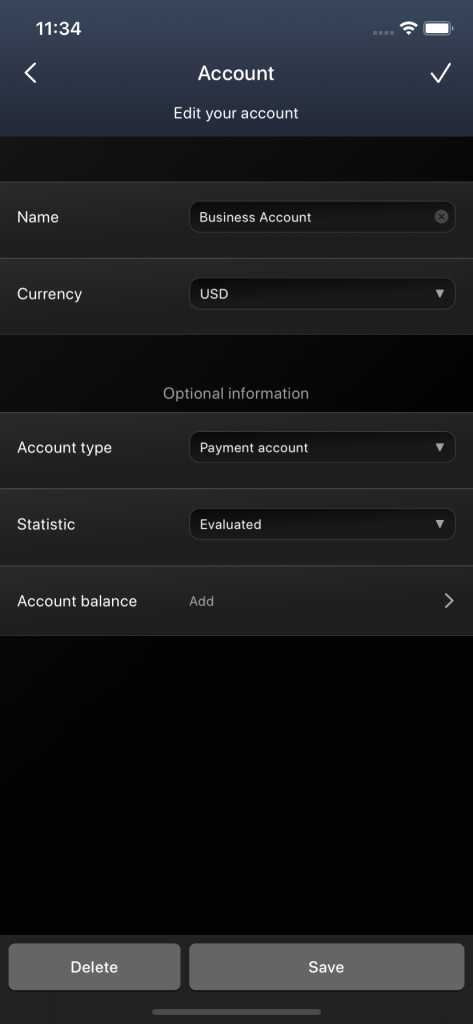
You can find the account settings in the settings (under More / Settings / Accounts). There you can add further accounts and edit or delete existing accounts.
To create a new account, you have to click on the plus symbol in the top right corner. Then an account name and account currency are required. Optionally, you can specify a special account type (payment account or savings account) in order to achieve a rough breakdown of the account balances in the overview and to group the different accounts. In the statistics mode, you can determine whether the account should be evaluated or not. If the account is set to “not evaluated”, it will still be displayed, but will not be taken into account when totaling the account balances and evaluations.
As a final point, you can set an account balance for the account. By default, the account balance for today is created. Since account balances are handled like normal transactions, you can also change the date of the account balance later. Manual account balances are shown in purple in MoneyStats.
To edit an account, simply click on it in the account settings. Then you can edit all the parameters mentioned above.
To delete an account, you also have to click on the account in the account settings. You can then delete the account at the bottom left. Please note that all transactions on the account will also be deleted!
You can determine the arrangement of your accounts in the account settings. Here you have the option to choose the sorting by name or to do a manual sorting. With manual sorting, you can arrange the accounts individually by clicking on the 3 lines on the far right. You can then determine a new position for the corresponding account by clicking on another account position again.
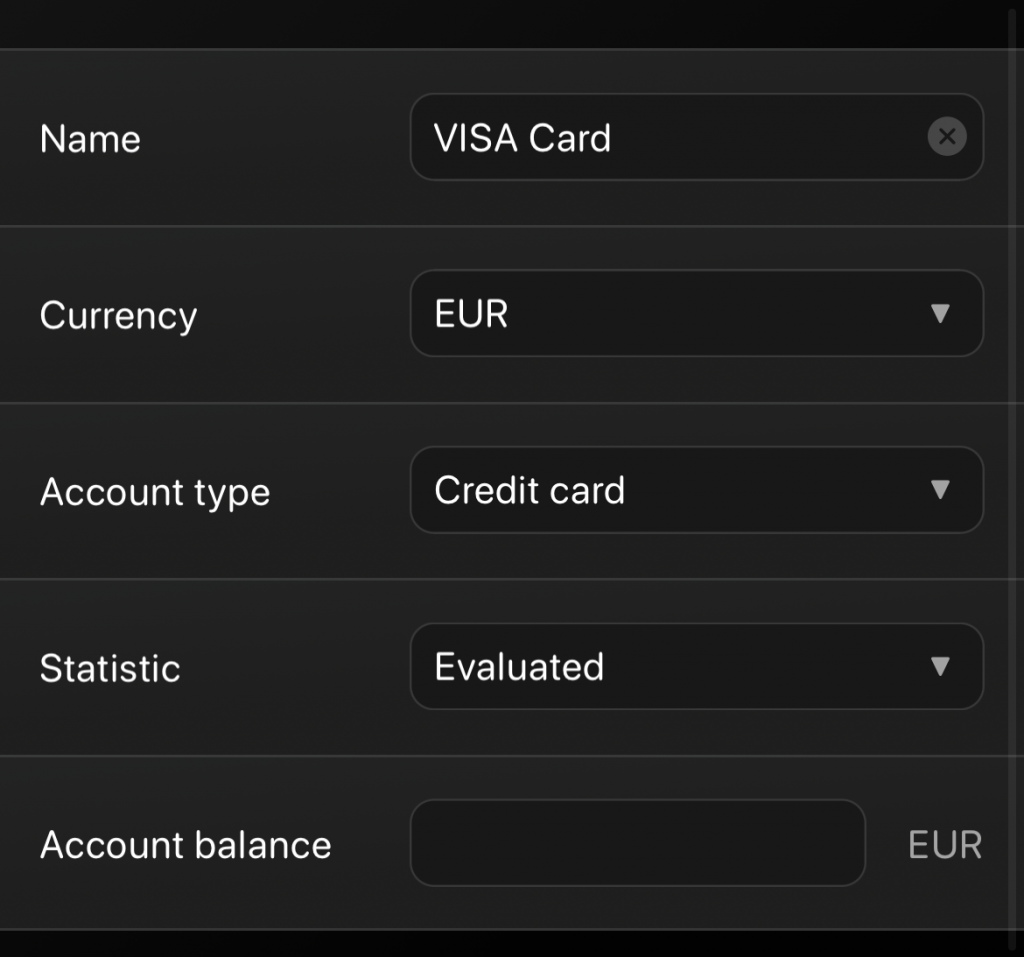
With the card limit, for example, you are assigned a kind of monthly budget for the credit card account. For example, if you entered 2,500 EUR there and you are now creating a new transaction for the credit card account, the remaining balance for this month will be displayed above the number pad when you enter an amount.

If you would like to have the claimed credit card amount automatically paid from one of your payment accounts every month as a chargeback, you can activate “Automatic payment” at the bottom. Additional information is required for this, such as the debit account, the closing date and the payment date.
The direct debit account serves as a reference account for the credit card. A transfer will be made from this account and the credit card amount used will be balanced again, so that you can use the full credit card limit again in the next month. In addition, you have to specify the closing day in order to define the period of credit card billing. For example, if you select the 31st day here, the billing period is always a full month. If you choose the 15th day, the credit card period will always be offset, for example from January 16, 2022 to February 15, 2022.
Note: In order for the automatic credit card debit to take place, the switch for “Automatic payment” must be activated.
The payment date, on the other hand, is the day on which your reference account is debited. This day must always be after the billing period of the credit card. So if we have now defined the billing period from January 16, 2022 to February 15, 2022 and you now select the 17th day as the payment date, for example, the automatic debit from your reference account (“debit account”) will take place two days after the closing day, i.e. on February 17, 2022. If, on the other hand, you choose the 14th day as the payment day, this day is still within the current credit card period and the 14th day is therefore set in the following month. The direct debit will therefore take place on March 14, 2022. This must be taken into account.
Categories
With the help of the categories you can categorize your transactions. The categories are located in the settings (under More / Settings / Categories). Here you can create, edit or delete different categories for your income as well as for your expenses.
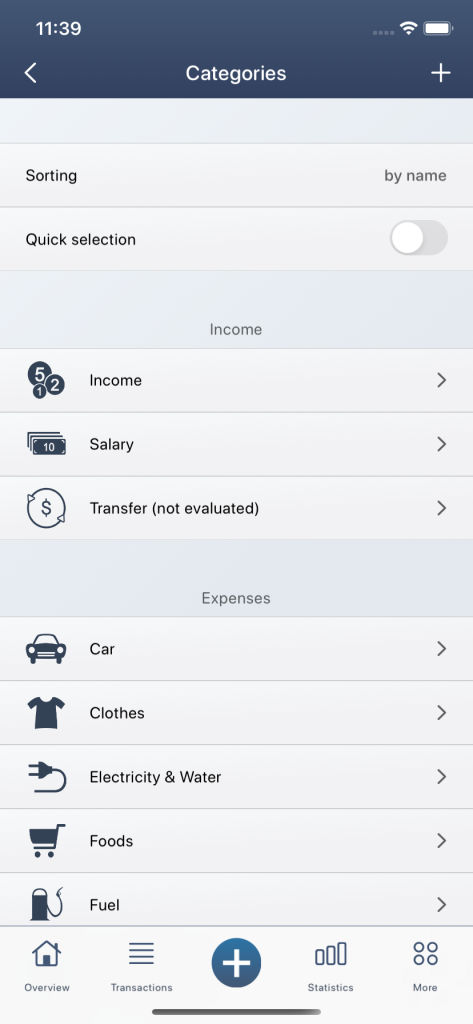
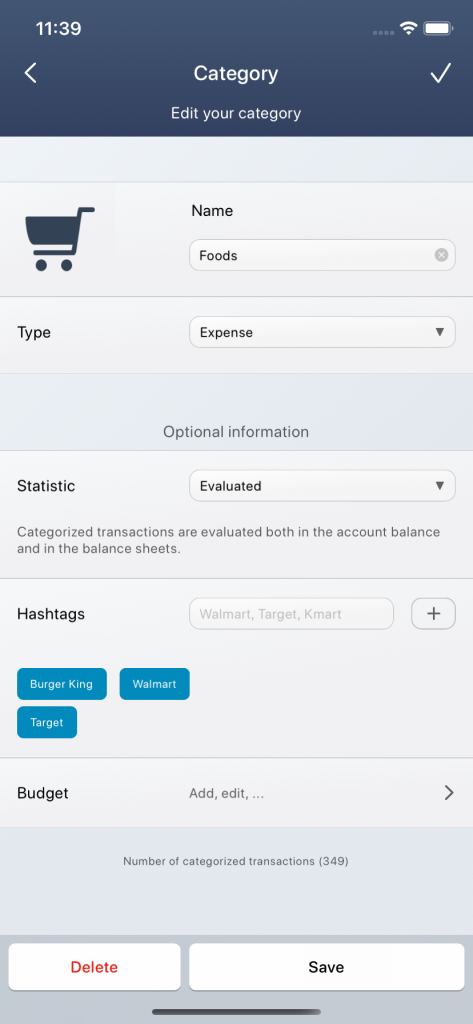
To create a new category, you have to click on the plus symbol in the categories at the top right. Then enter a category name and you have to determine whether it is an income or expenditure. Left to the name, you can choose a suitable category picture. To use a category image from your own photos, you have to scroll the category pictures to the far bottom. There you can click on the button to select an own photo.
For the category, you can optionally specify under Statistics, whether you want to have it evaluated or not. If the category is set to “not evaluated” and you now categorize transactions with this category, the corresponding transaction is not taken into account in the evaluations, but only in the account balances. The amounts of the transactions are then put in brackets.
Note: The special category “Transfer” is set to “not evaluated” by default, so that money transfers from one account A to another account B are not taken into account in the profits or losses of the evaluations. However, this can also be changed by editing the special category and setting the mode to “evaluated”.
In order to be able to make even more detailed evaluations, there is also the option of using the hashtags. These hashtags are subcategories or keywords for the corresponding category and can also be used to categorize transactions. Using the example of the “Groceries” category, you could add the hashtags “Walmart”, “Aldi” and “Trader Joes” to identify the distribution of your grocery expenses among the individual supermarkets.
Note: Hashtags and budgets can only be added to categories that have already been created or saved.
Since you can also assign a budget to each category, there is also the option at the bottom to add a budget to categories that have already been created. You will be forwarded directly to the budget view.
To edit a category, simply click on it in the category view. Then you can edit all the parameters mentioned above.
To delete a category, you also have to click on the category in the category view. You can then delete the category at the bottom left. Please note that all categorizations of the relevant transactions will also be removed!
You can arrange your categories in the same way as the accounts in the account view. Here you have the option of sorting by name, frequency or by topic, or performing a manual sorting. With manual sorting, you can arrange the individual categories individually by clicking on the 3 lines on the far right. You can then determine a new position for the corresponding category by clicking on another category position again.
There is also the option of activating the quick selection in the category view. With active quick selection, suitable categories are displayed above the amount field, which can be used to quickly categorize the transaction. Depending on the amount, the most relevant categories are sorted in the front. For example, if you enter an amount between USD 5 and USD 60, the “Groceries” category will be sorted first. However, if you enter a higher amount, such as USD 800, the “Rent” or “Vacation” category will be offered.
If you only want to change the category picture of an existing category, you can also click on the respective category picture on the far left in the category view. This will open a new image selection, where you can choose a new image.
You will also be offered templates for various topics under the existing categories. You can use this to quickly create new categories for your income and your expenses.
